TECH
Vol.74

Engineer
Y.M.
Easy Structured Data: Let's Try the Data Highlighter


Introduction
In search engine optimization, SEO measures have become indispensable.
The methods for attracting visitors to sites have diversified due to various factors such as the spread of smartphones and the mainstreaming of social media.
A recent trend is that data optimization alone is no longer sufficient—the content, usefulness, and value of the information itself are being given priority.
That said, this doesn't mean data optimization has been disregarded. Rather, it's become something you simply must include as a matter of course—an essential, foundational setup that has become a kind of standard practice. As a first step, it's important to tell search engines like Google that "my site is about this kind of content."
The conventional Title, Description, and Alt attributes do convey this, but they only provide information like the site's name, summary, and image alt text.
Search engines can't determine—from just Title, Description, and Alt attributes alone—whether the web page is an article, a blog, an official company page, or a page where you can purchase products.
The Data Highlighter we'll introduce this time is one of the tools for marking up structured data to communicate to search engines what they need to judge a web page's value—things like "what kind of information is on this web page" or "which organization runs it."
schema.org
To "mark up" structured data, you typically need to edit HTML source code or do some coding.
However, for people who aren't familiar with HTML, it can be unclear what to write or feel intimidating, so even when people want to implement it, they often struggle to take action.
Google's Data Highlighter is a relatively easy-to-use tool, so let's implement it together as you read along with this article.
Preparation
Before Setting Up Search Console
The prerequisite is that you manage your site with Google.
Integration goes smoothly if you manage your site with a Google Analytics account.
If you're not using Google Analytics, we strongly recommend using it.
*This article assumes the setup has been completed.
We've also introduced how to set up Analytics in our TIPS articles, so please take a look there as well.
TIPS vol.38 "Google Analytics: A Handy Web Analytics Tool Worth Knowing"
Site Setup
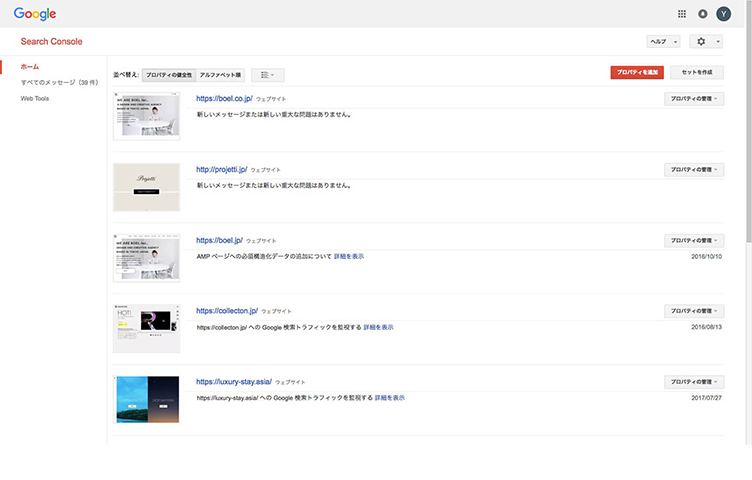
If this is your first time using Search Console, you'll first need to register your site.
Clicking "Add a property" brings up an input field, as shown below.
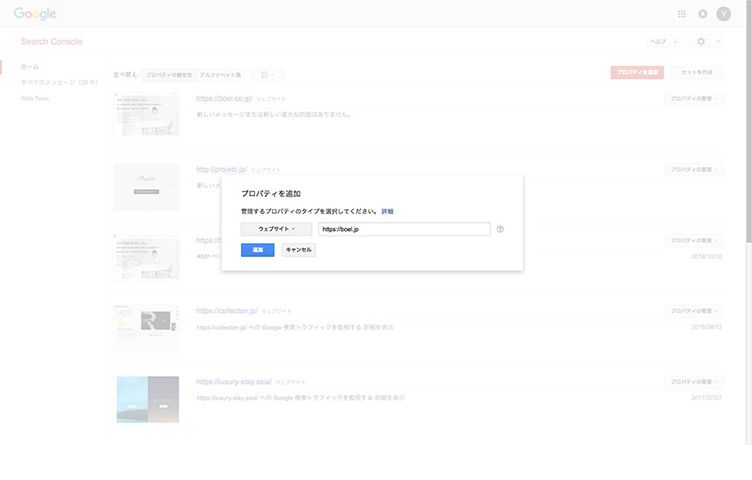
Select "Website," enter a URL starting with "http://" or "https://", and click "Add."
On the next screen, you'll verify ownership. This confirms that the web page actually belongs to you.
Click "Alternate methods" to display the options.
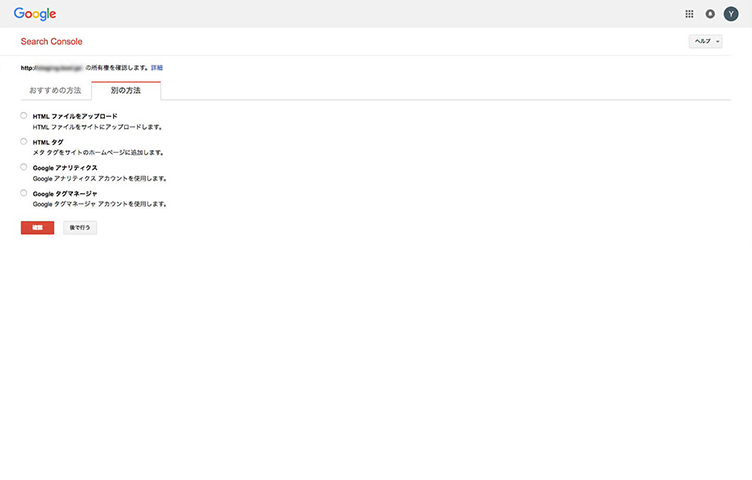
Select "Google Analytics" and click "Verify."
If everything is fine, this will integrate with Analytics and complete the ownership verification.
*If there's an issue, try other methods.
The easiest is to upload an HTML file to the root directory of your domain (where your home page file is located) and verify it.
*If you use a tag, you'll need to edit the HTML.
*Tag Manager requires a Google account.
Setting Up the Data Highlighter
Once your property has been added, begin setting up your site.
For first-time registration, there are other settings to configure, but this time we'll focus only on the Data Highlighter.
From the Search Console home screen, click your domain URL. The screen below will open.
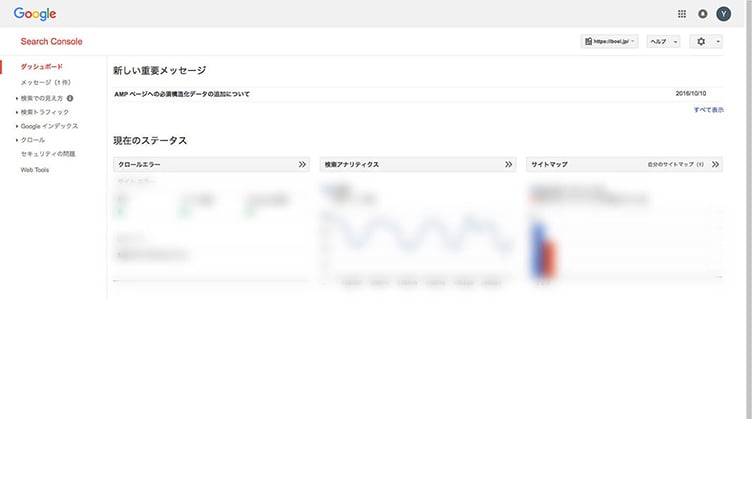
Click "Search Appearance" to open the menu, then click "Data Highlighter."
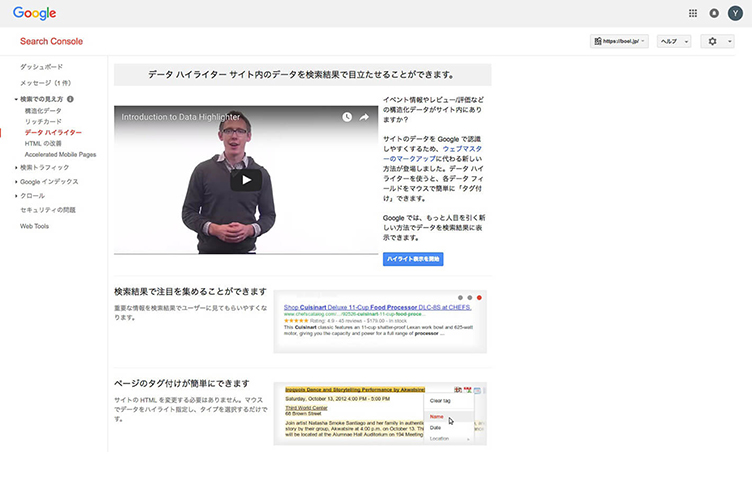
Click the "Start Highlighting" button. A popup like the one below will appear.
The website content types supported by the Data Highlighter are as follows:
- Articles
- Events
- Local businesses and services
- Movies
- Products
- Restaurants
- Software applications
- TV show episodes
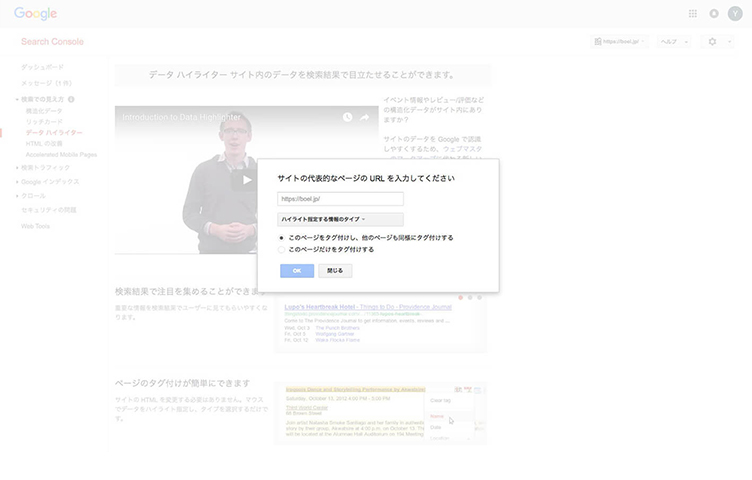
For this explanation, we'll use TIPS as an example and proceed with setup.
TIPS will be set up under "Articles." Generally, blogs and columns fall under the "Articles" category.
Enter the URL you want to tag, then click "OK."
If you select "Tag this page and others like it," then after you tag a few pages yourself, Search Console will automatically tag other similar pages.
If there are no detailed page-specific specifications, select this option.
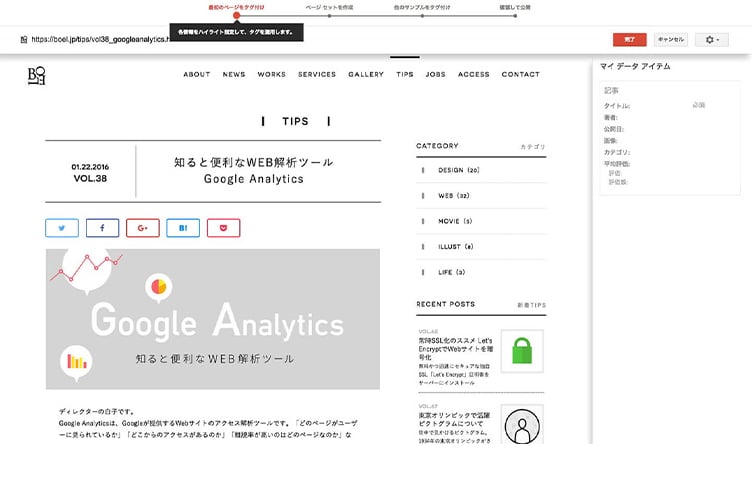
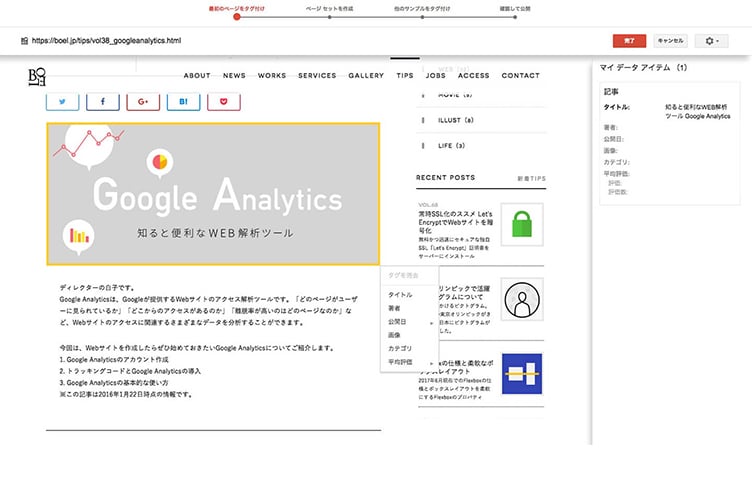
After clicking "OK," the page at the URL you entered will be displayed.
You can click on text or other items to select them.
In the screenshot, we clicked "Google Analytics: A Handy Web Analytics Tool Worth Knowing."
When you click, options will appear for you to choose what the selected text represents.
Tagging
The "Article" type has the following options:
- Title
- Author
- Date published
Date and time (automatic)
Advanced settings (manual entry) - Image
- Category
- Average rating
Rating
Advanced settings
Score
Maximum rating count
Select "Title" and tag the title.
Once set, the tagged content will be shown in the list on the right.
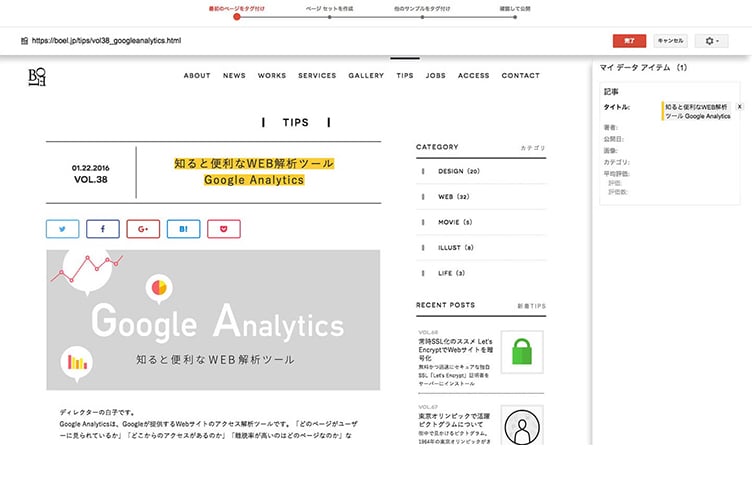
Next, tag the images.
When you tag multiple images, all images within that content will be tagged automatically.
If they're not automatically tagged, tag them one by one.
If there are any unnecessary images, manually delete them from the list on the right.
Continue tagging anything else that can be tagged.
Text, links, images—any element displayed on the site can be tagged.
With TIPS, we were able to tag the title, date, images, and category.
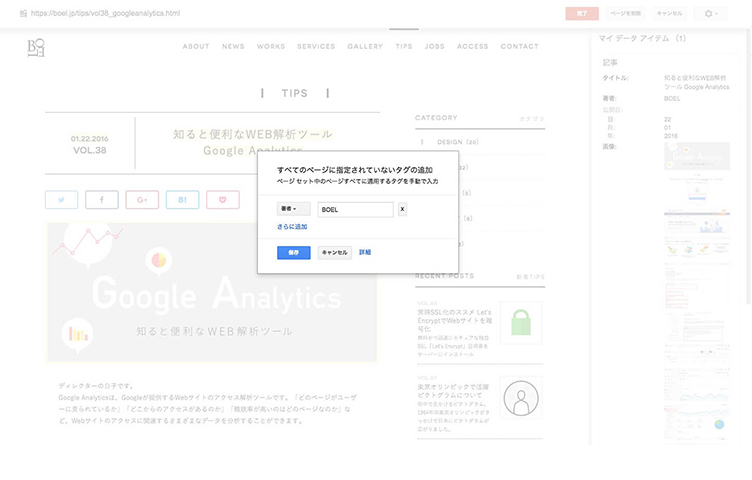
Custom Tagging
You can also add custom tags for things not displayed on the site.
Click the lock icon in the upper right and select "Add missing tags."
A popup will appear—make your selection there.
Since the page didn't have any author information, we added "BOEL."
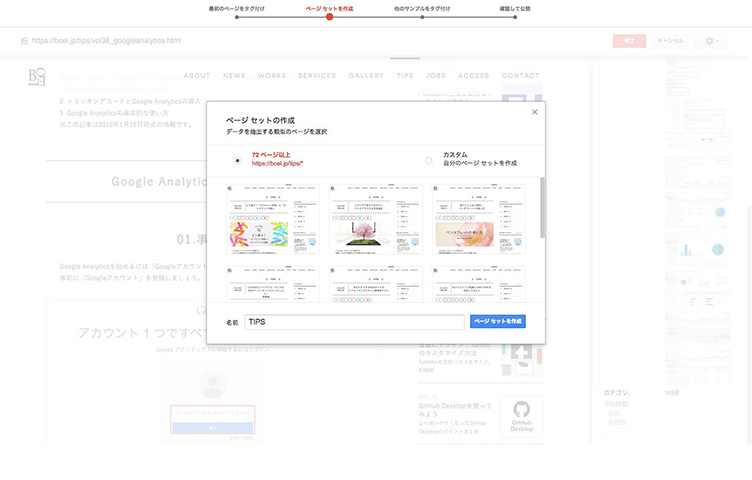
Once tagging is complete, click "Done."
A popup will appear.
Similar pages will be automatically tagged.
Give the set a name of your choice and click "Create Page Set."
Adjusting Automatic Tagging
Next, check and correct the tags on pages that were automatically tagged.
If there are any errors or inappropriate tags, correct them.
If there are pages that don't fit or are unnecessary, use "Remove pages."
As you set up several pages, patterns emerge and the process becomes automated.
Continue setting up according to the steps and confirm the data at the end.
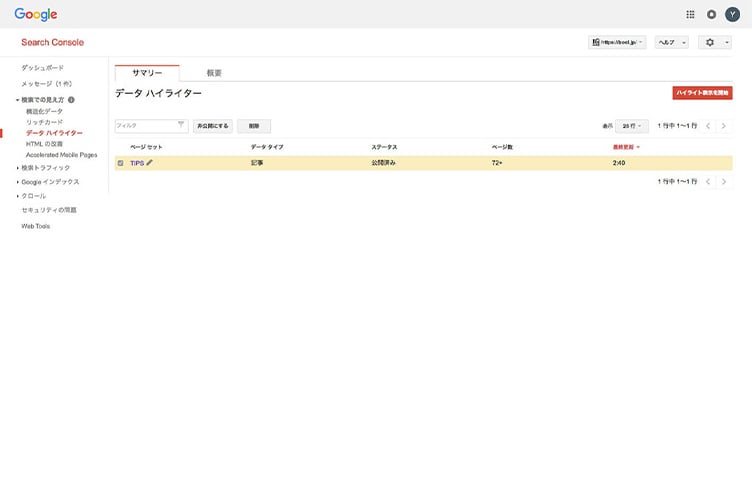
Once data confirmation is complete, click "Publish."
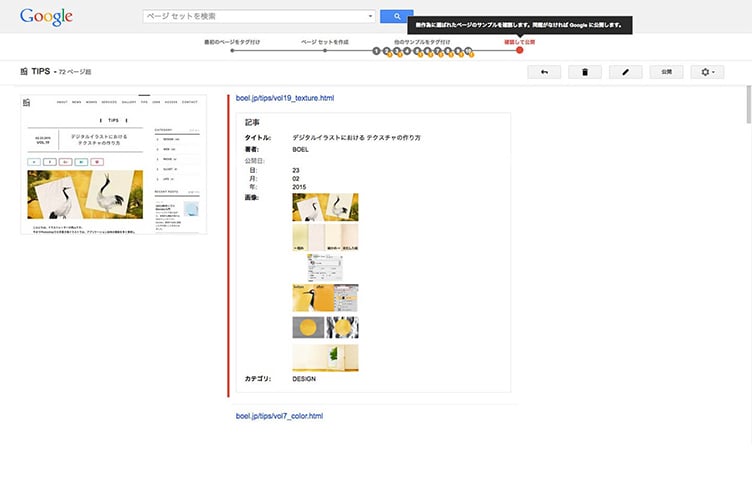
Once the data is published, you'll be taken to a screen like the one below.
You're all done—now just wait for it to be reflected.
You can edit the published data anytime. If you want to stop publishing, you can also make it private.
Make changes as needed.
*It may take several days for changes to be reflected.
Conclusion
Even without knowing HTML or schema, you can use the Data Highlighter intuitively to define your website's content and communicate it to search engines.
Since you proceed through fixed options, detailed specifications like those possible with schema can be difficult, but it's still a way to convey at least some content to search engines—definitely worth doing.
When reviewing your site to set up the highlighter, if you find that there isn't much to tag, you may notice that some elements are missing from your site.
This can also be a chance to revisit your site's elements and content.
We hope this helps your SEO in some way.
RECENT POSTS

Vol.203
What Is Design Management

Vol.202
Why Hiring No Longer Works— Redesigning Organizations and Decisions for an Uncertain Age

Vol.201
How to Choose a Branding Agency: 5 Criteria to Avoid Failure

Vol.200
Design Management: A Practical Guide for SMEs and Startups to Drive Real Results

Vol.199
How to Rebuild Brand Competitiveness: A Practical Guide to Brand Management for SMEs

Vol.198
From parent–child bonds to community: The future of education that nurtures diversity and designs relationships


