MOVIE
Vol.12

Art Director
L.S
Video Production Workflow: Adobe After Effects (Pro Edition)


Introduction
Adobe After Effects Pro is basically similar to Premiere. However, it differs in how it is used compared to Adobe’s image-based applications. In this article, we will explain in detail the workflow of video editing using After Effects.
Please also check out our previous article, Vol.10: How to Create Videos – Adobe Premiere Edition.
1. Creating a Project
Create a project (.aep file).
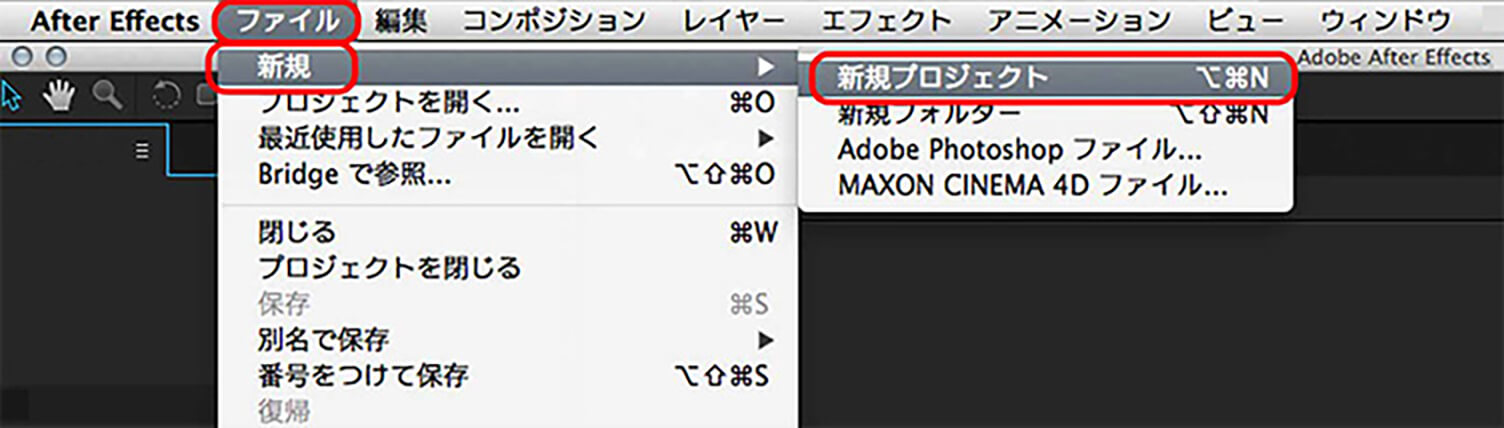
By launching After Effects, a new project is already created by default. Go to the menu and select “File” → “New” → “New Project” to create a new project screen.
*Note: You cannot open multiple projects at the same time.*
2. Creating a Composition
A composition is a container used to build a video

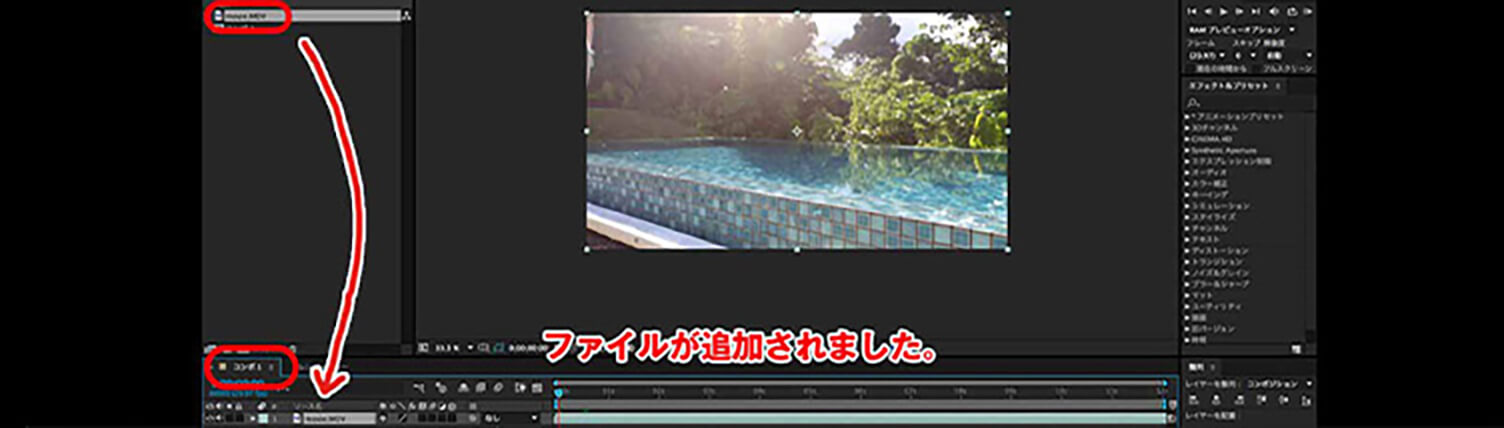
Next after creating a project, you create a “composition.” Select “Composition” → “New Composition” from the menu.
Alternatively, you can also create it by clicking “Create New Composition” at the bottom of the Project panel.
A dialog box will appear. Adjust the settings according to your purpose. These settings can be changed later as well. The composition will then be created in the Project panel.

3. Importing Assets (Video and Images)
Difference Between Footage and Composition
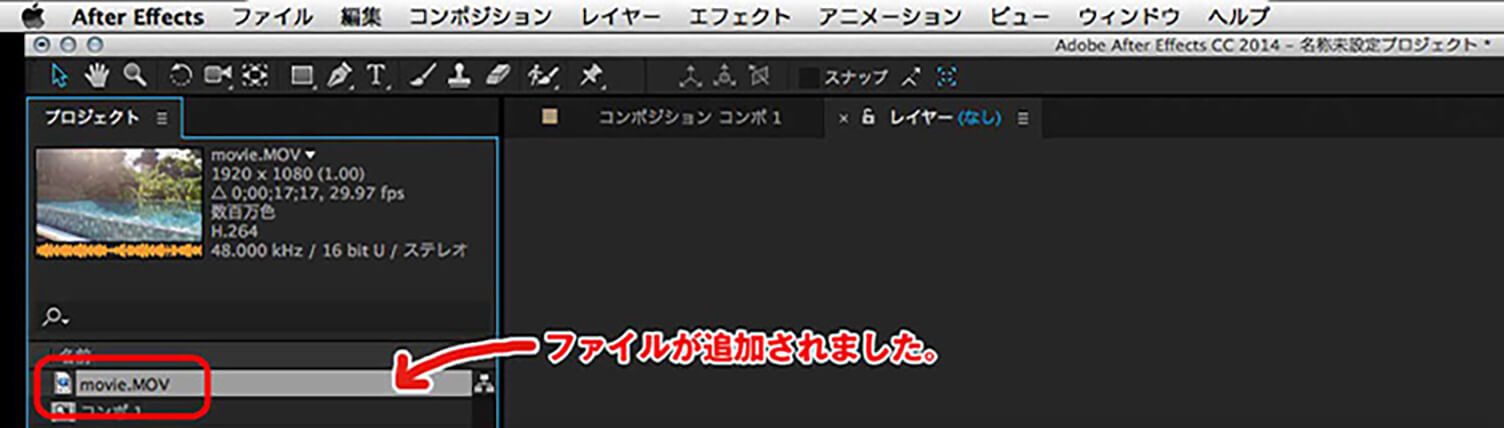
Select the asset file from the menu via “File” → “Import.” Alternatively, you can directly drag and drop the assets from their folder into the workspace. You can also double-click the Project panel in the workspace to open a dialog box and select files from there. Once the imported file name appears in the Project panel, the import is complete.
<Import types when bringing in assets>
When importing files, there are two import types: “footage” and “composition.” The difference is that “footage” imports the selected file as a single image, while “composition” imports the file while preserving its layer structure.
- When importing as “footage”
JPG files are typically imported as footage. However, when importing layered Photoshop or Illustrator files as footage, you can choose whether to merge them into a single image or import only one specific layer. - When importing as “Composition – Retain Layer Sizes”
Layered Photoshop or Illustrator files are imported while preserving layers, but any unnecessary areas are trimmed. - When importing as “Composition”
Layered Photoshop or Illustrator files are imported while preserving layers, maintaining their original position and size.
4. Animating the Assets
Creating Animation
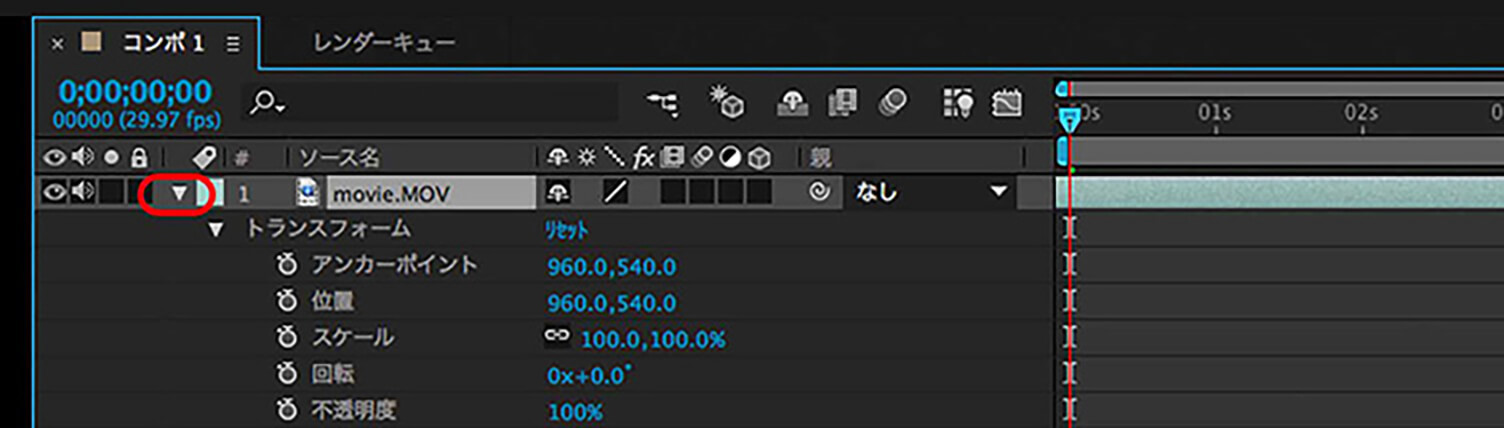
Open the “Transform” properties from the layer in the Timeline panel.
<Creating a vertical movement animation>
We will create an animation that moves this asset from top to bottom.
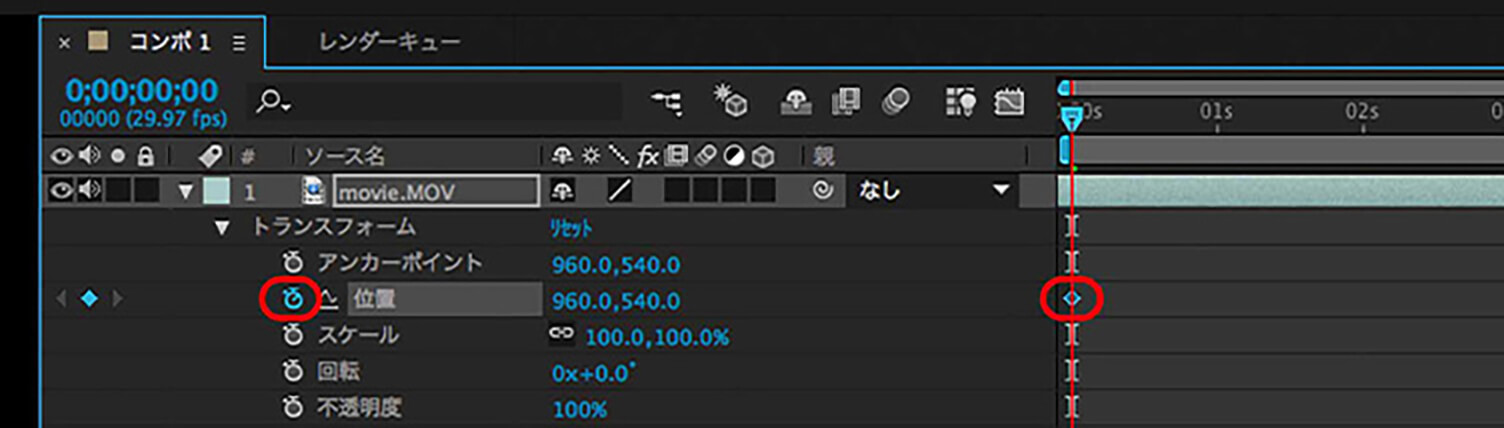
- Creating keyframes
Inside “Transform,” you will find the “Position” property. Click the “stopwatch” icon next to “Position.” This will add a “keyframe” to the timeline.
※A “keyframe” is used when setting motion, effects, and other parameters.
It works like defining a starting point and an ending point, with the animation automatically generated between them.
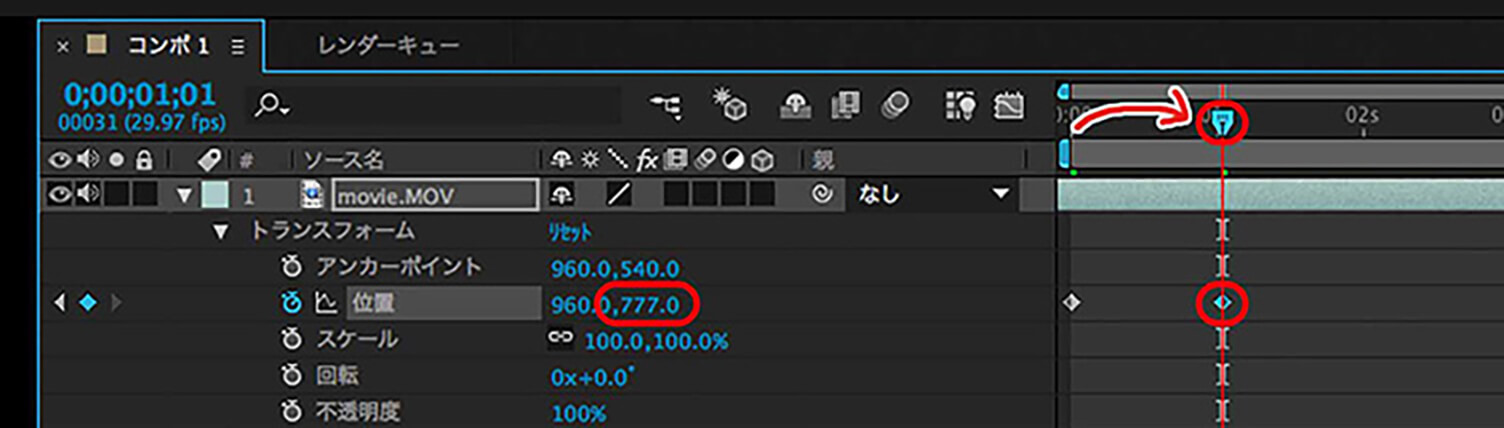
- Creating the second keyframe
Move the time indicator and change the numeric value next to “Position.” ※These two values represent the X and Y axes.
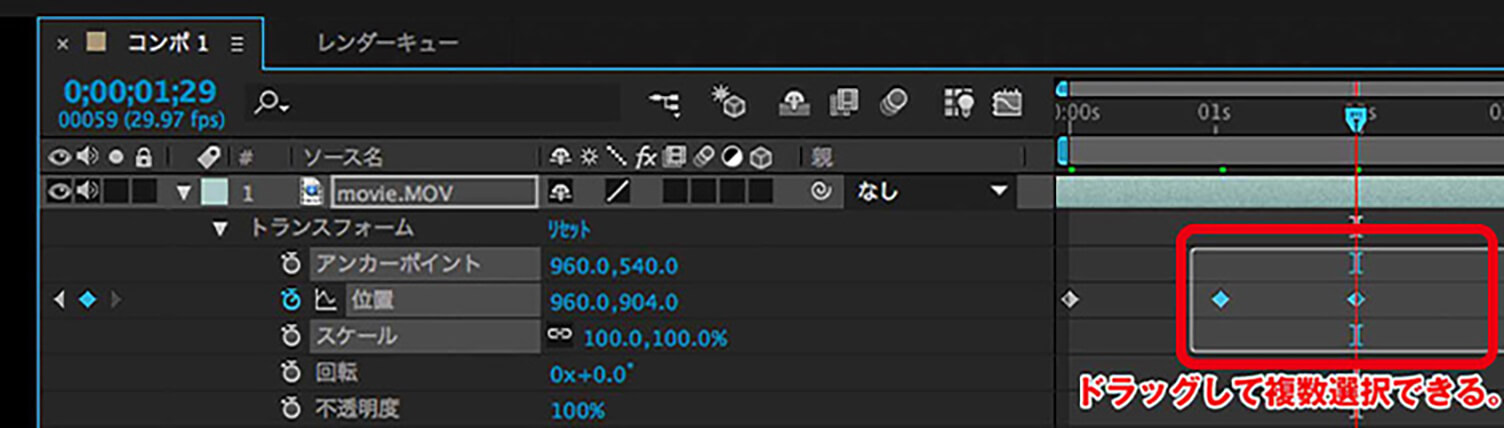
An animation path will appear, and the movement from top to bottom will be created. - How to delete an animation
If you want to completely change the movement, you can click the stopwatch icon for the property to remove all keyframes, or select individual keyframes and delete them using the Delete key. You can also select multiple keyframes at once as shown in the image below.
5. Exporting as a Video Format
The process of exporting is called “rendering.”
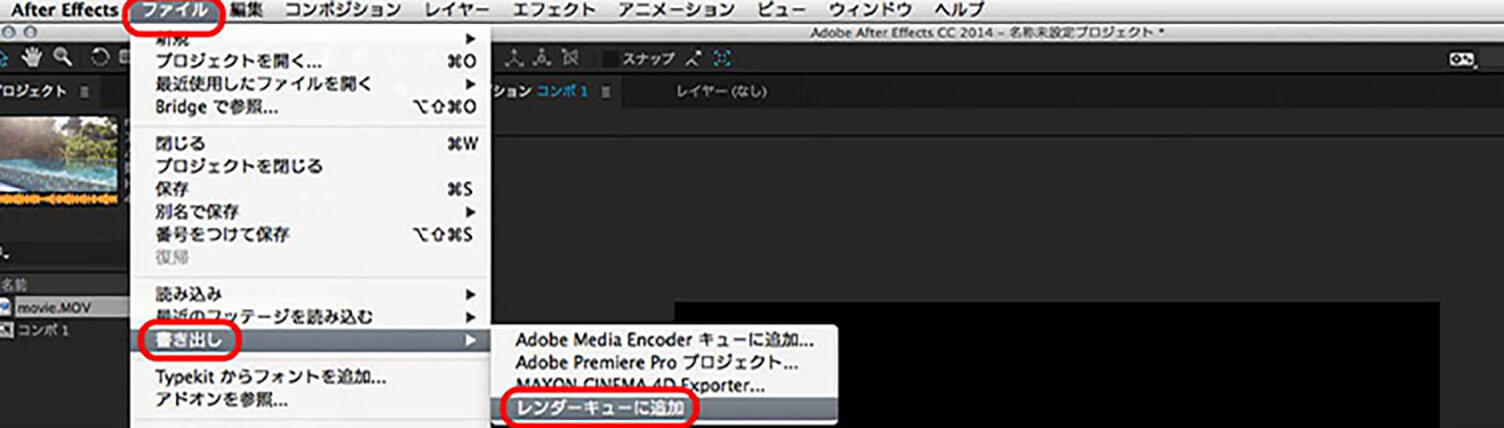
Select the composition you want to export as a video format. From the “File” menu, choose “Export” and select the file type that matches your purpose. Exporting takes time. Therefore, when you need to edit and export multiple items, you can add them to the render queue after editing and perform
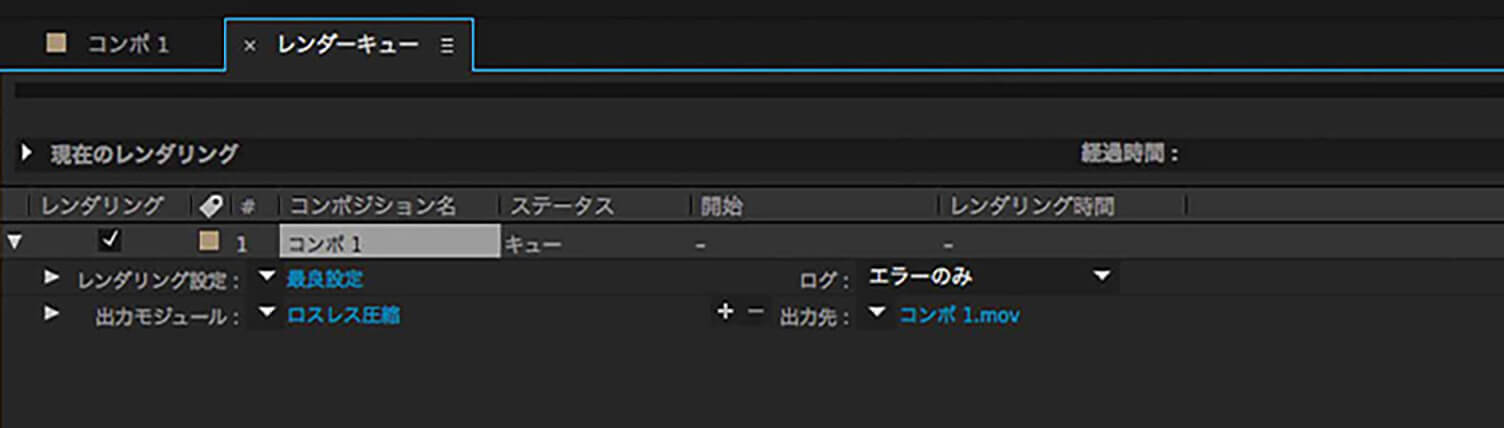
When you select “Add to Render Queue,” the rendering information is added to the Render Queue. If you want to change settings such as file type, you can do so in the “Output Module.” If you want to export multiple files at once, repeat the same process and add them to the Render Queue.
When you press the “Render” button, the compositions registered in the Render Queue will be rendered sequentially from top to bottom.
Summary
We introduced how to create videos in After Effects. What is written here is truly just a small part of it. There are countless possibilities, almost infinite things you can do, so it’s a tool worth mastering.
RECENT POSTS

Vol.203
What Is Design Management

Vol.202
Why Hiring No Longer Works— Redesigning Organizations and Decisions for an Uncertain Age

Vol.201
How to Choose a Branding Agency: 5 Criteria to Avoid Failure

Vol.200
Design Management: A Practical Guide for SMEs and Startups to Drive Real Results

Vol.199
How to Rebuild Brand Competitiveness: A Practical Guide to Brand Management for SMEs

Vol.198
From parent–child bonds to community: The future of education that nurtures diversity and designs relationships


