MOVIE
Vol.10

Art Director
L.S
How to create videos: Adobe Premiere Pro guide


Adobe Premiere Pro
As you might expect, it works differently from Adobe image-editing applications, and I remember finding it very difficult to use when I first started.
This time, I’ll explain the workflow of video editing using Premiere.
1.Creating a project
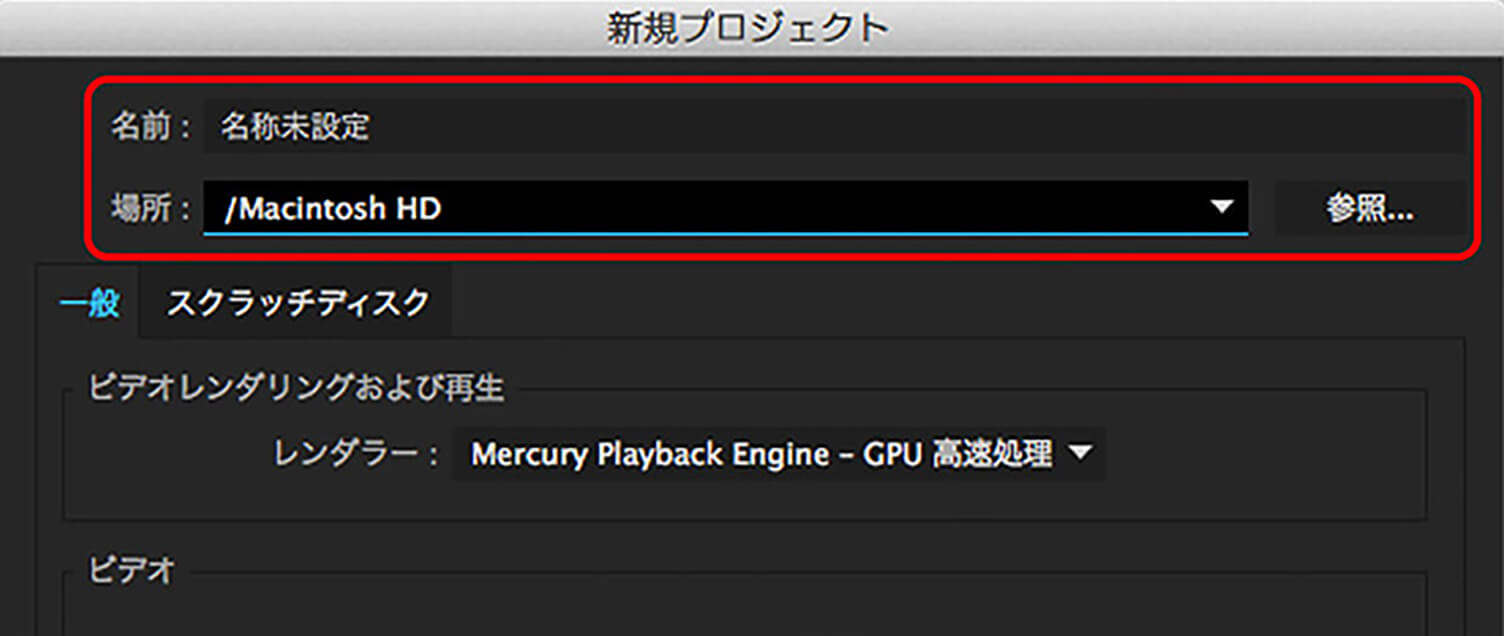
Create a “project” (.prproj file)

When you first launch Premiere, go to “Create New” in the start window, select “New Project,” enter a file name, and click “OK” to create a project.
2.Creating a sequence
A sequence is something that specifies the size and format of the video you are creating
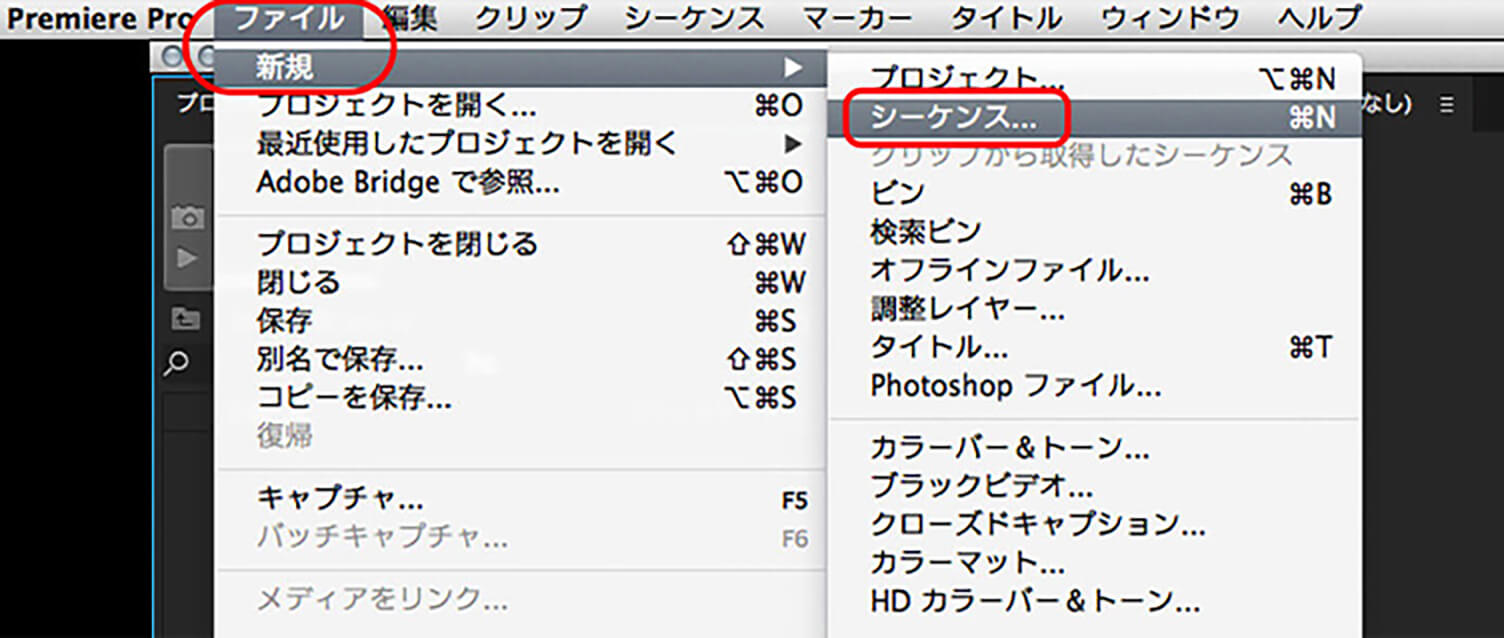
After creating a project, the next step is to create a “sequence.” Go to the menu and select “File” → “New” → “Sequence.” A sequence is used to specify the video’s size and format.
If you’re thinking, “There are too many presets and I don’t know which one to choose…,” don’t worry. From Premiere Pro CS6 onward, the software automatically selects an appropriate sequence based on the imported video.
Once the sequence is created, its name will appear in the timeline window.
3.Importing media (video and still images)
You can import not only video footage but also still image data

Select media files via “File” → “Import” in the menu. Alternatively, you can directly drag and drop files from the media window to import them, or double-click the project window in the workspace to open the file selection dialog.
If the imported file name appears in the project window, the import is complete. If it fails, a pop-up error window will be displayed.
4. Editing media on the timeline
Selecting the cuts you want to use and removing unnecessary cuts

Place the media on the sequence. By dragging and dropping the imported files, they will be placed on the sequence. You can check the placed media in the Program Window.
After placing the media on the sequence, select the Razor Tool and click the start and end points of the section you want to use in the video. Once the clip is cut, switch back to the Selection Tool, select the unwanted parts, and press the Delete key to remove them. You can preview the result by pressing the play button in the Program Window.
Alternatively, you can double-click the media in the Project Window to open the Source Window. There, set “In” and “Out” points (start and end of the section you want to use), then drag and drop it onto the timeline to extract only the desired portion.
This method also allows you to extract only the video or only the audio from a clip. It is useful when you want to edit video and audio separately.

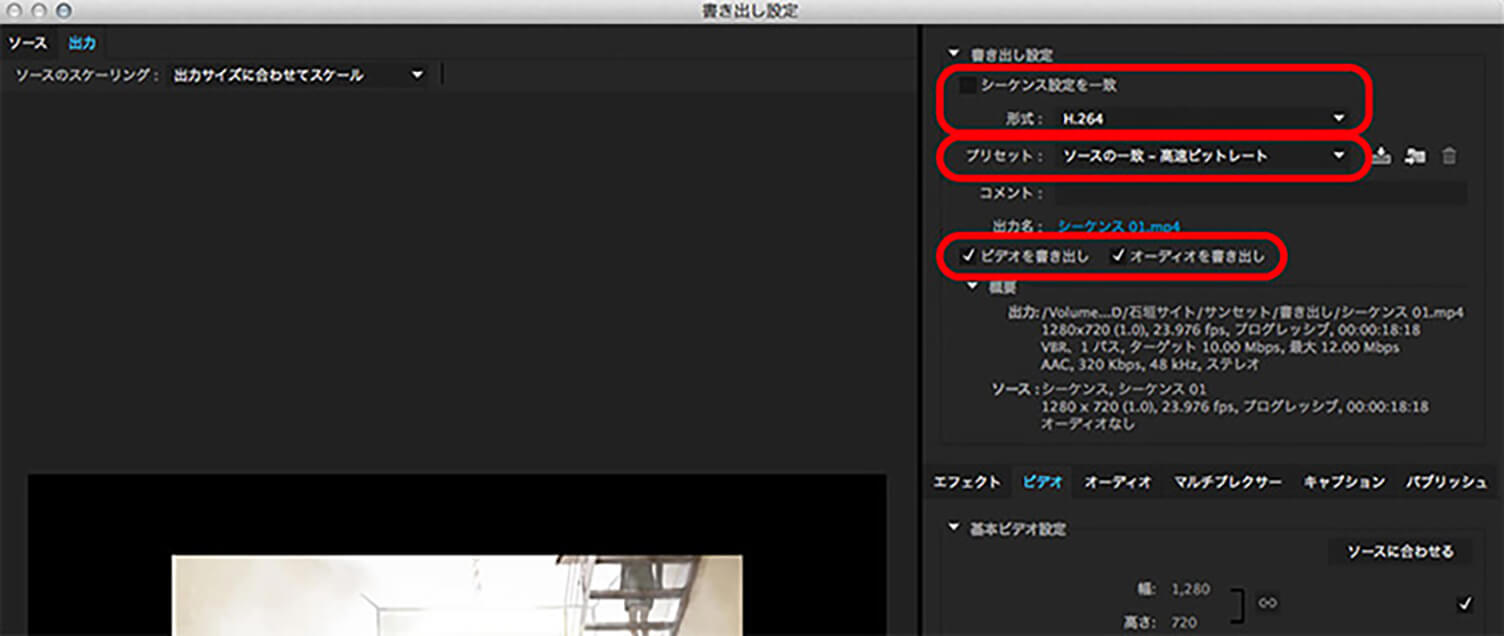
5. Exporting as a video file.
The exported file is the final version of the video

Select the sequence, then go to “File” → “Export” → “Media.” As in the beginning, there are many settings here as well, but if you are publishing videos online, setting the format to “H.264” and the preset to “YouTube HD 1080p 29.97” will allow you to export in high quality.
Depending on the settings, you can freely export in high or low quality, large or small file sizes, and more.
Summary
Let’s keep creating and get comfortable using it!
How was creating videos in Premiere? It may feel a little intimidating at first due to the interface, but the sense of accomplishment after exporting your work is especially rewarding. Let’s keep creating more projects and get comfortable using it.
RECENT POSTS

Vol.203
What Is Design Management

Vol.202
Why Hiring No Longer Works— Redesigning Organizations and Decisions for an Uncertain Age

Vol.201
How to Choose a Branding Agency: 5 Criteria to Avoid Failure

Vol.200
Design Management: A Practical Guide for SMEs and Startups to Drive Real Results

Vol.199
How to Rebuild Brand Competitiveness: A Practical Guide to Brand Management for SMEs

Vol.198
From parent–child bonds to community: The future of education that nurtures diversity and designs relationships


