TECH
Vol.52

Engineer
M.S.
Not Just Choosing! Create Your Own Original WordPress Theme


Basic Structure
Below is the basic file structure for a standard blog theme.
Additional files such as JavaScript files can be added as needed.
index.php
header.php
footer.php
sidebar.php
single.php
style.css
functions.php
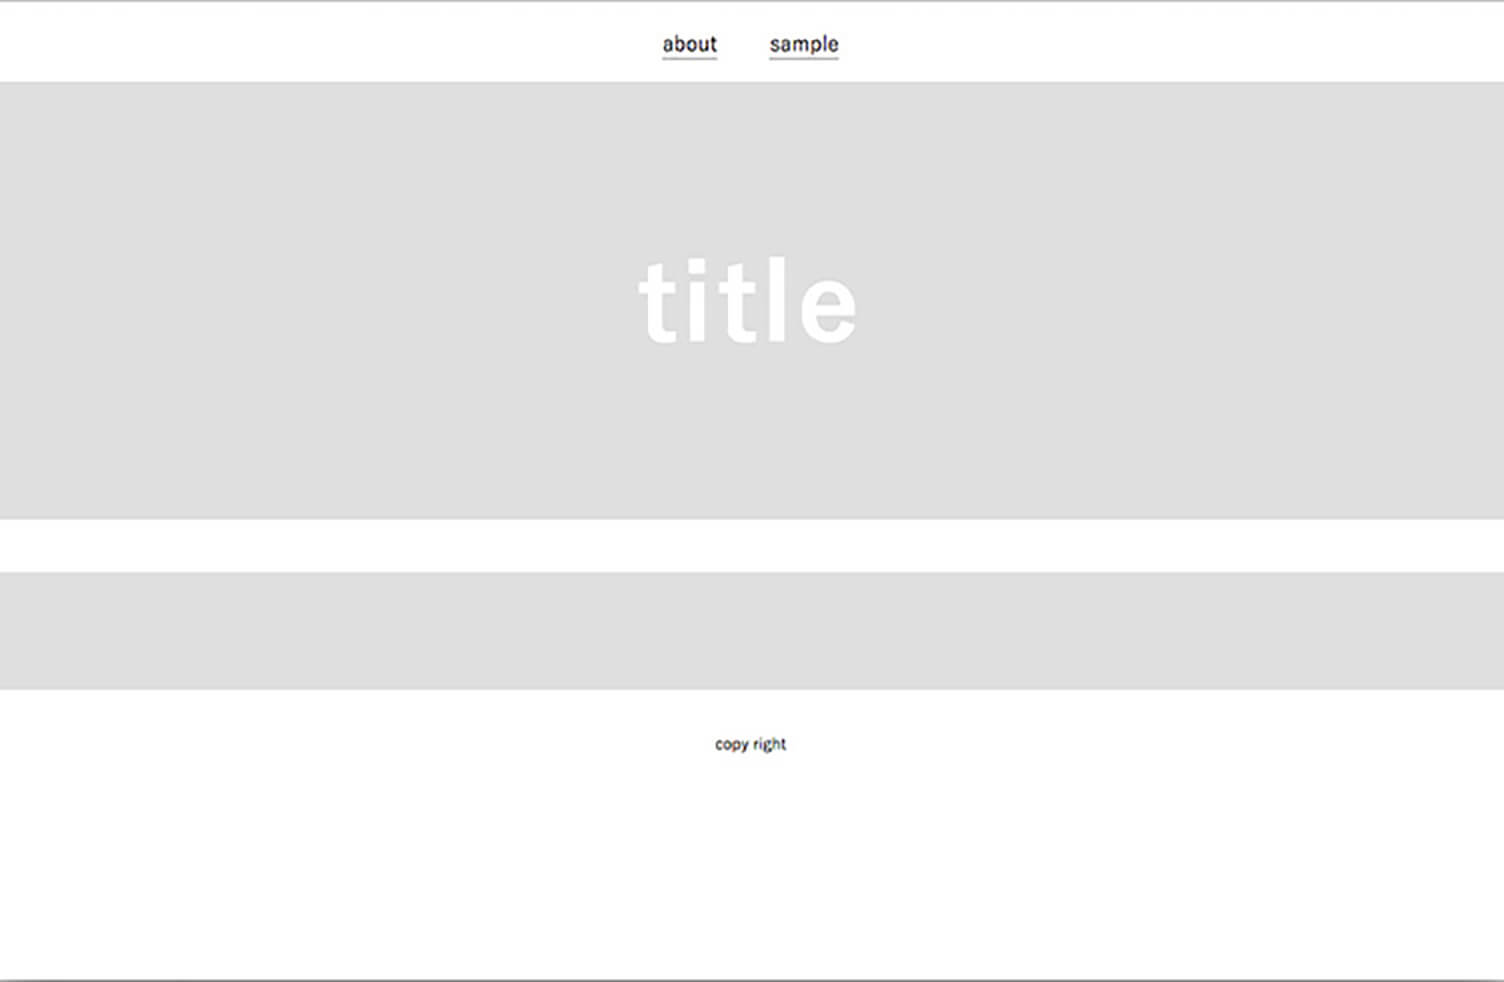
The visual structure of the web page is shown below.
Each file is responsible for creating a specific part of the page, which is a characteristic feature of PHP-based development.

There are several files not shown in the image above,
but the remaining files will be explained later in each section.
The WordPress theme directory structure is as follows:
- wordpress
- wp-content
- themes
- sample
(The directory for the theme created in this tutorial)
If you place a folder inside the “themes” directory and add the theme files to it, the theme you created will appear under Appearance → Themes in the WordPress admin panel.
A thumbnail image is optional, but adding one helps make the theme feel more like a complete original design.
Template Tags
WordPress provides its own specialized PHP functions called template tags.
The existence of these functions is one of the reasons why even PHP beginners can create WordPress themes relatively easily.
Of course, since these are WordPress-specific tags, they cannot be used outside of WordPress.
Below are some of the template tags used in creating this WordPress theme.
<?php wp_head(); ?>
// Indicates that the file is the header

<?php wp_footer(); ?>
// Indicates that the file is the footer


<?php get_header(); ?>
// Calls (displays) the header

<?php get_footer(); ?>
// Calls the footer

<?php get_sidebar(); ?>
// Calls the sidebar


<?php wp_nav_menu(); ?>
// Calls the menu for static pages

<?php echo get_stylesheet_uri(); ?>
// Retrieves the URL of the stylesheet

<?php echo get_site_url(); ?>
// Retrieves the URL of the site


<?php if ( have_posts() ) : while ( have_posts() ) : the_post(); ?><?php endwhile; endif; ?>
// Calls posts
// (Automatically determines whether to display posts, pages, etc. depending on where it is written)

<?php if ( is_active_sidebar( 'widget_area' ) ) : dynamic_sidebar( 'widget_area' ); else: ?><?php endif; ?>
// Calls widgets (such as categories or archive lists)

<?php if(is_home()): ?>Content displayed on the homepage<?php else: ?>Content displayed on other pages<?php endif; ?>
// Displays different content for the homepage and other pages

<?php bloginfo(); ?>
// Displays the blog title

<?php the_title(); ?>
// Displays the title
// (Automatically determines whether to display the page title, post title, etc. depending on where it is written)

<?php echo get_the_date(); ?>
// Displays the post date
Create a Theme
Now, we can finally start creating the theme.
Since mixing PHP into the project from the very beginning can be difficult,
let’s first build the overall layout using HTML and CSS.
Here is the sample page created for this tutorial.
Using this HTML as a base, we will divide it into individual parts and build the WordPress theme step by step.
Create the Header and Footer
The header and footer are elements that are displayed on every page.
Even if the main content is still empty, having these in place already makes the page feel complete.
First, copy and paste the header portion of the code into header.php,
and the footer portion into footer.php.
Then, replace parts of the pasted HTML with WordPress template tags.
Header
<!DOCTYPE html>
<html>
<head>
<title>Title</title>
<link rel="stylesheet" href="style.css" type="text/css">
<script src="https://ajax.googleapis.com/ajax/libs/jquery/2.1.4/jquery.min.js"></script>
</head>
<body>
<div class="container">
<div id="header">
<header>
<nav class="menu">
<ul>
<li>menu</li>
<li>menu</li>
<li>menu</li>
</ul>
</nav>
<h1 class="index_ttl">Title</h1>
</header>
</div>
<div class="main">
↓
<!DOCTYPE html>
<html>
<head>
<title>
<?php if(is_home()): ?>
<?php bloginfo('name'); ?>
<?php else: ?>
<?php the_title(); ?>|<?php bloginfo('name'); ?>
<?php endif; ?>
</title>
<link rel="stylesheet" href="<?php echo get_stylesheet_uri(); ?>" type="text/css">
<script src="https://ajax.googleapis.com/ajax/libs/jquery/2.1.4/jquery.min.js"></script>
<?php wp_head(); ?>
</head>
<body>
<div class="container">
<div id="header">
<header>
<?php wp_nav_menu(); ?>
<h1 class="index_ttl"><a href="<?php echo get_site_url(); ?>">Title</a></h1>
</header>
</div>
<div class="main">
Footer
<div class="foot_bar">
<div class="ft_bar">
<div class="widget">
<ul>
<span class="widgettitle">Category</span>
<li>orange</li>
<li>yellow</li>
</ul>
</div>
<div class="widget">
<ul>
<span class="widgettitle">Archive</span>
<li>1082'13</li>
<li>1082'12</li>
</ul>
</div>
<div class="widget">
<ul>
<span class="widgettitle">New</span>
<li>13/0</li>
<li>13/0</li>
</ul>
</div>
</div>
</div>
<footer>
<div id="footer">
<p>copy right</p>
</div>
</footer>
</div>
</body>
</html>
↓
</div>
<div class="foot_bar">
<div class="ft_bar">

<?php if ( is_active_sidebar( 'widget_area' ) ) : dynamic_sidebar( 'widget_area' ); else: ?>
<div class="widget"><h2>No Widget</h2></div>
<?php endif; ?>

</div>
</div>
<footer>
<div id="footer">
<p>copy right</p>
</div>
</footer>
<?php wp_footer(); ?>
</body>
</html>
The amount of code has increased and become a bit more complex.
However, your header and footer should now be complete.
Try adding only <?php get_header(); ?> and <?php get_footer(); ?> to index.php.
You should see the header and footer displayed like this:
You may notice that the widget area is not displayed yet.
Also, there is no widget editing menu in the WordPress admin panel.
This is where functions.php comes in.
Try adding the following code to functions.php.
<?php
register_sidebar( array(
'name' => 'Widget Area',
'id' => 'widget_area',
'description' => 'This is the widget area',
'before_widget' => '<div id="%1$s" class="widget %2$s">',
'after_widget' => '</div>',
) );
?>
After adding this code, check the WordPress admin panel again.
Under the “Appearance” menu on the left, you should now see a “Widgets” option.
From there, you can configure widgets such as categories and archives.
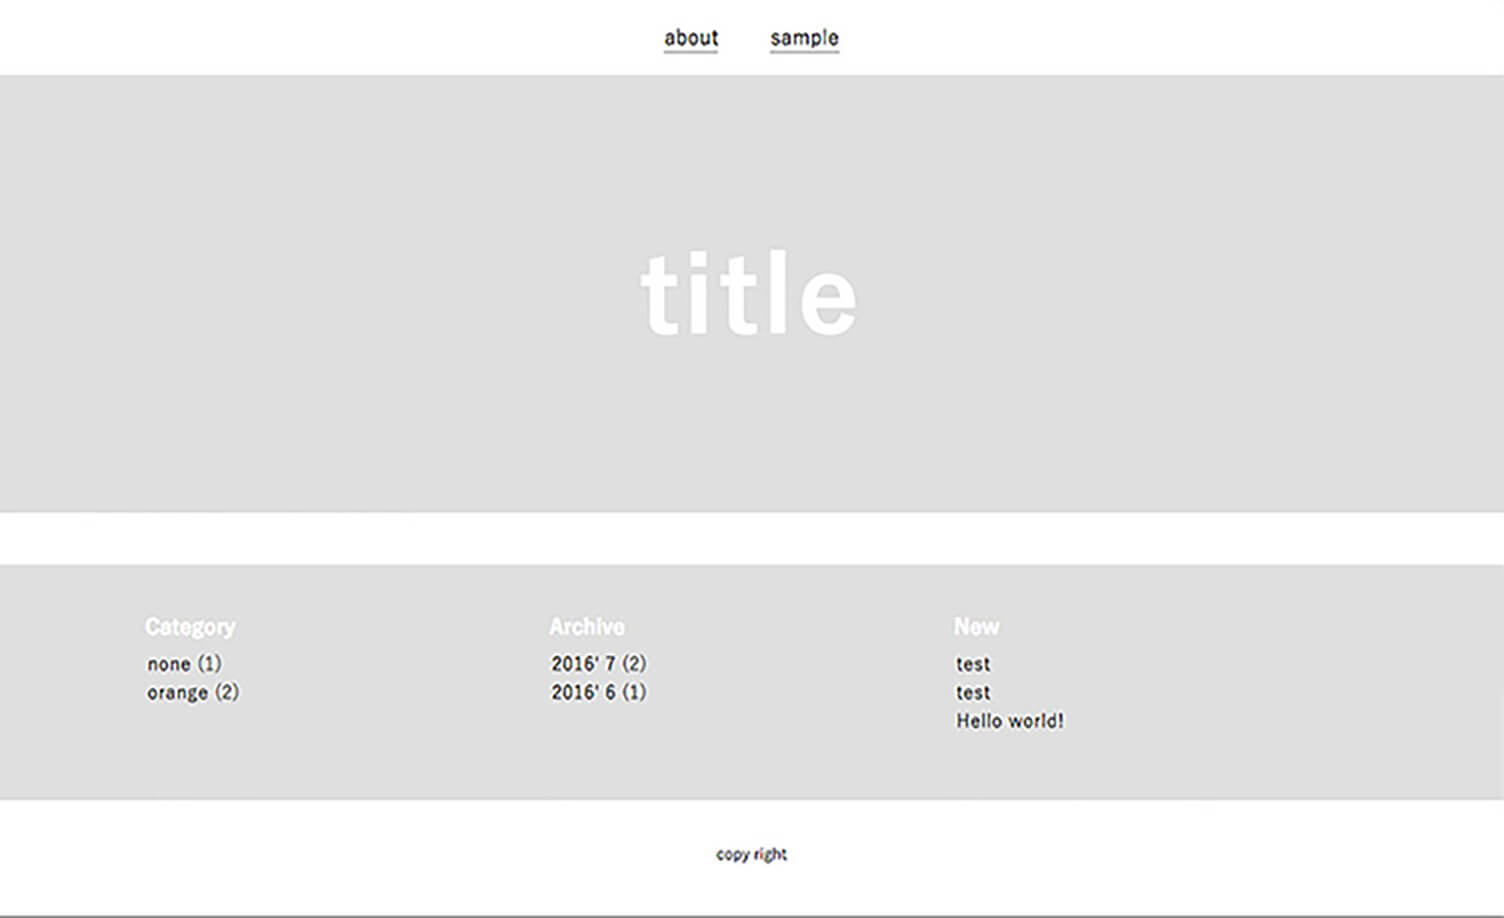
Once configured, check index.php again.
The widgets you set should now appear like this:
Create the Main Content Area
Next, we will create the article section, which serves as the main content area of the blog.
Just like before, we will apply WordPress template tags to the HTML code we initially created.
<article>
<h2 class="article_ttl">Article Title<span>1082' 13/0</span></h2>
<div class="article_text">
<p>
Article content goes here
<div class="continuation"><a>more »</a></div>
<p>
Continuation of the article goes here
</p>
</div>
</article>
↓
<?php if ( have_posts() ) : while ( have_posts() ) : the_post(); ?>
<article>
<h2 class="article_ttl"><?php the_title(); ?><span><?php echo get_the_date(); ?></span></h2>
<div class="article_text">
<p>
<?php the_content('more »'); ?>
</p>
</div>
</article>
<?php endwhile; endif; ?>
This completes the article section.
You may notice a template tag in the middle that was not introduced earlier.
<?php the_content('more »'); ?>
This is a template tag used to display the article (content), and the text inside the parentheses specifies the string used for the “Read More” link.
In this case, “more »” is used as the replacement text for “Read More.”
Let’s preview the page at this stage.
You should see the sample post displayed, and when creating a new post, the “Read More” link will appear with the specified text.
At this point, the page now matches the original HTML layout we created.
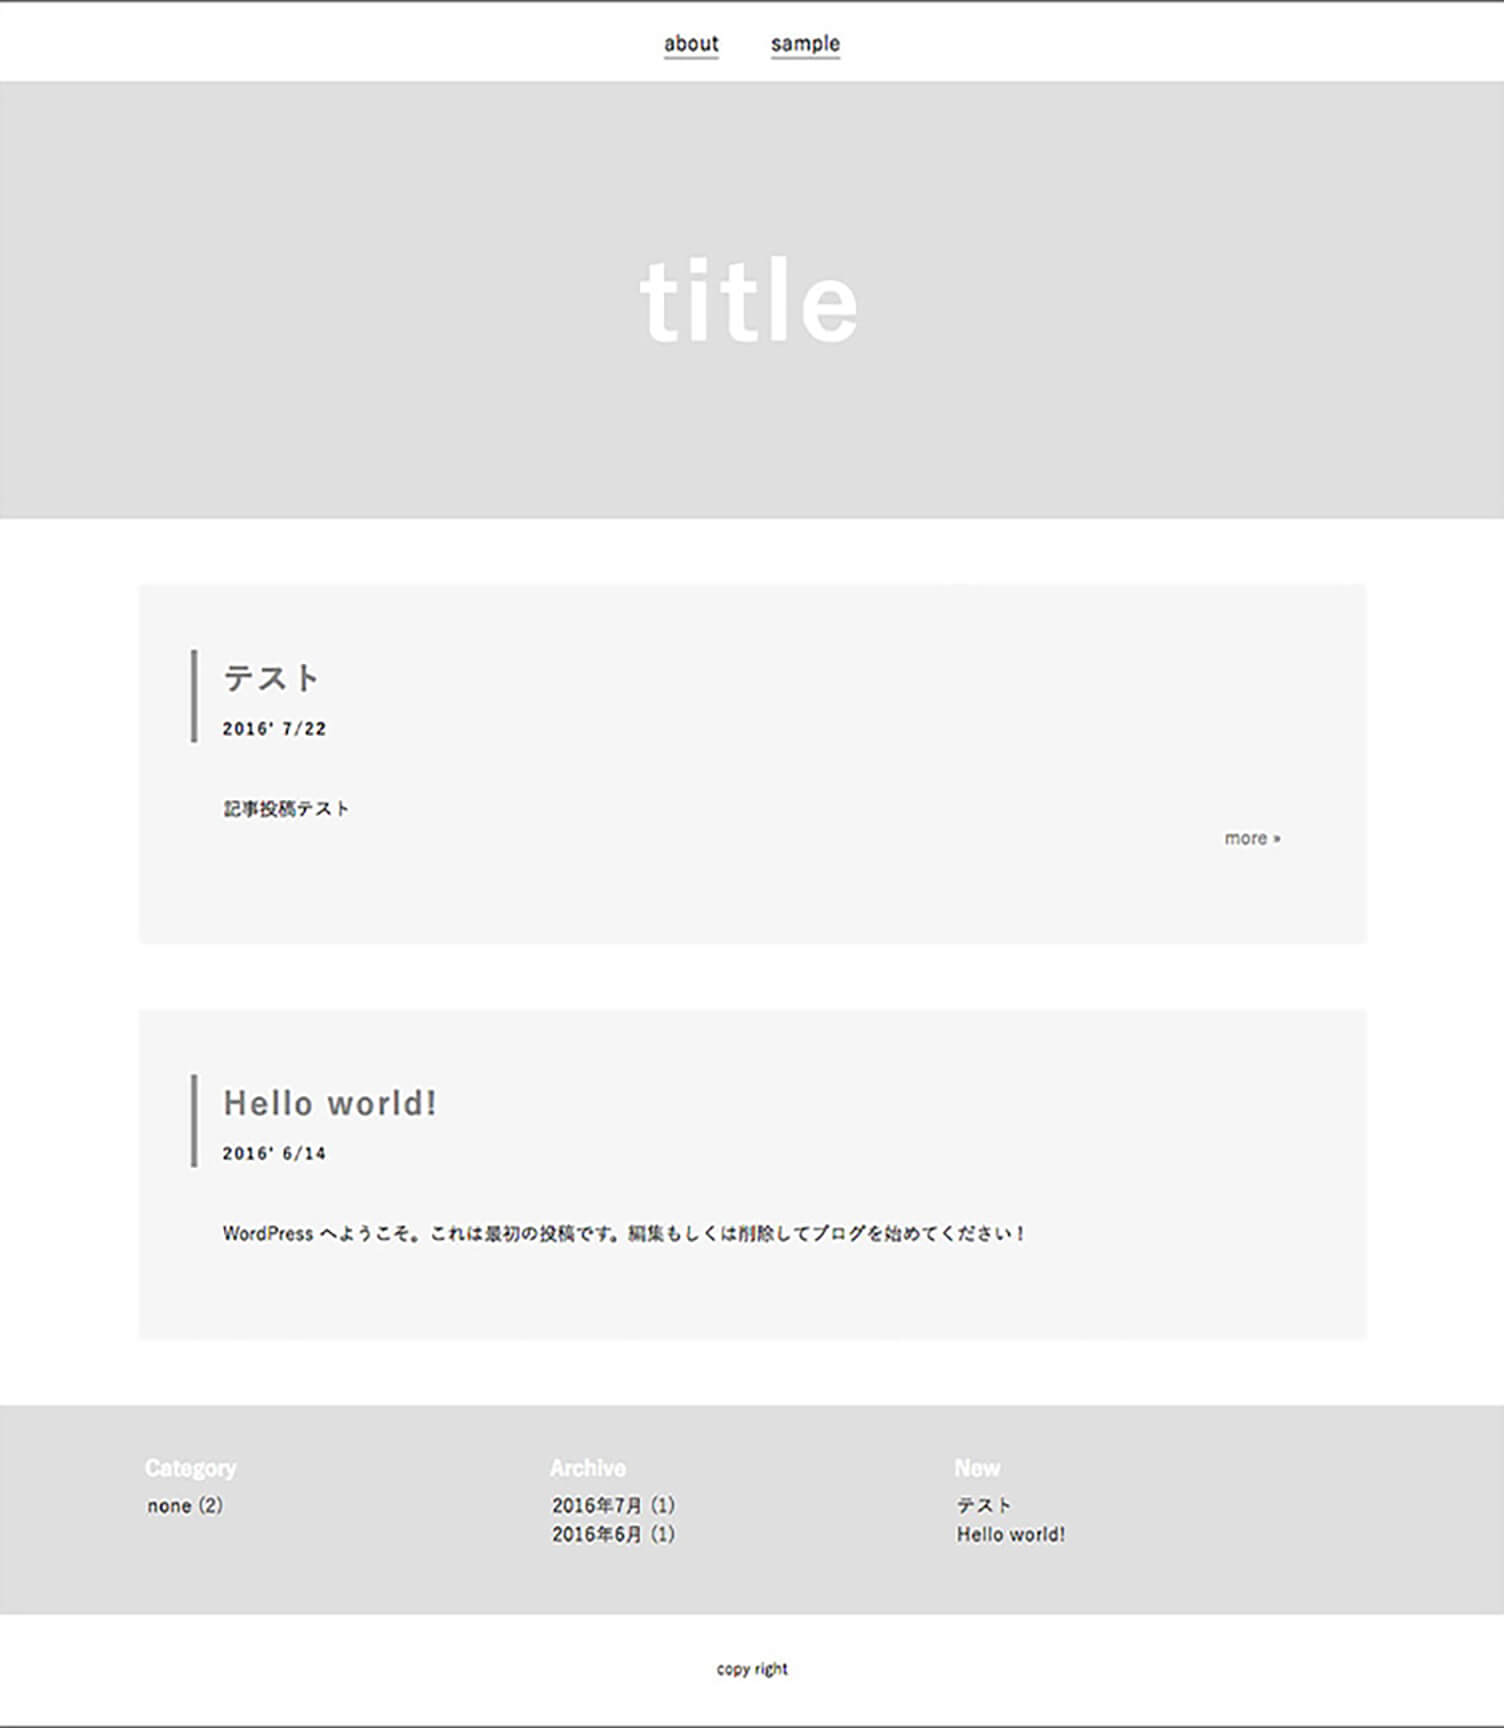
Now the index page is complete, but the pages linked from “Read More” and the menu’s static pages are still blank.
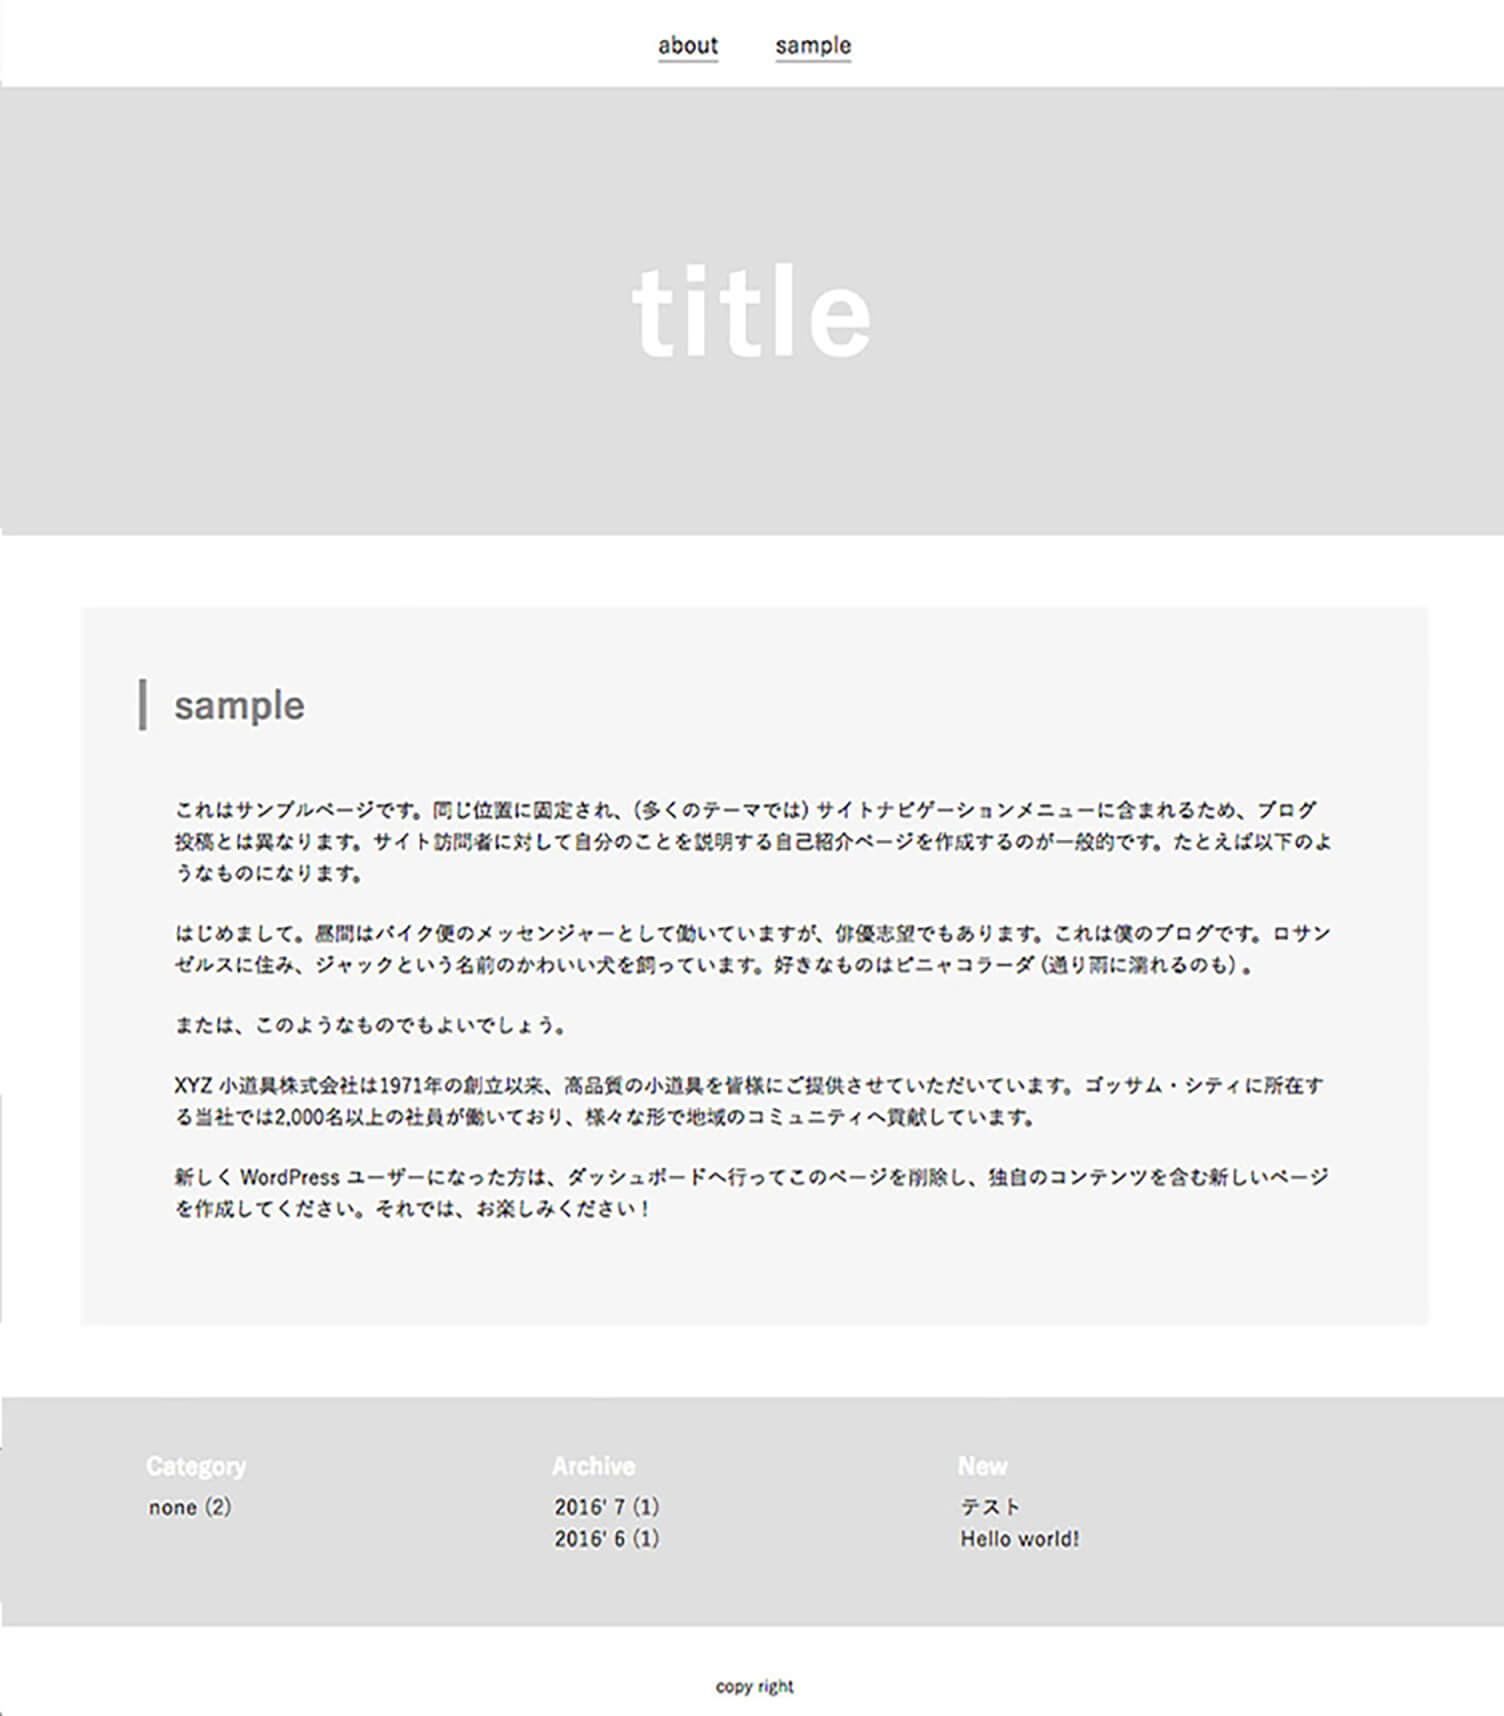
In this sample theme, the static page menu is displayed at the top.
In the image below, the menu section is highlighted with a blue outline.
You can see “about” and “sample.” “about” is a newly created static page, while “sample” is the default sample page included in WordPress.
Next, let’s edit the page displayed after clicking “Read More.”
This is handled in single.php, but for now, simply copy and paste the entire contents of index.php.
<?php get_header(); ?>
<div class="top_main">
<?php if ( have_posts() ) : while ( have_posts() ) : the_post(); ?>
<article>
<h2 class="article_ttl"><?php the_title(); ?><span><?php echo get_the_date(); ?></span></h2>
<div class="article_text">
<p>
<?php the_content(''); ?>
</p>
</div>
</article>
<?php endwhile; endif; ?>
</div>
<?php get_footer(); ?>
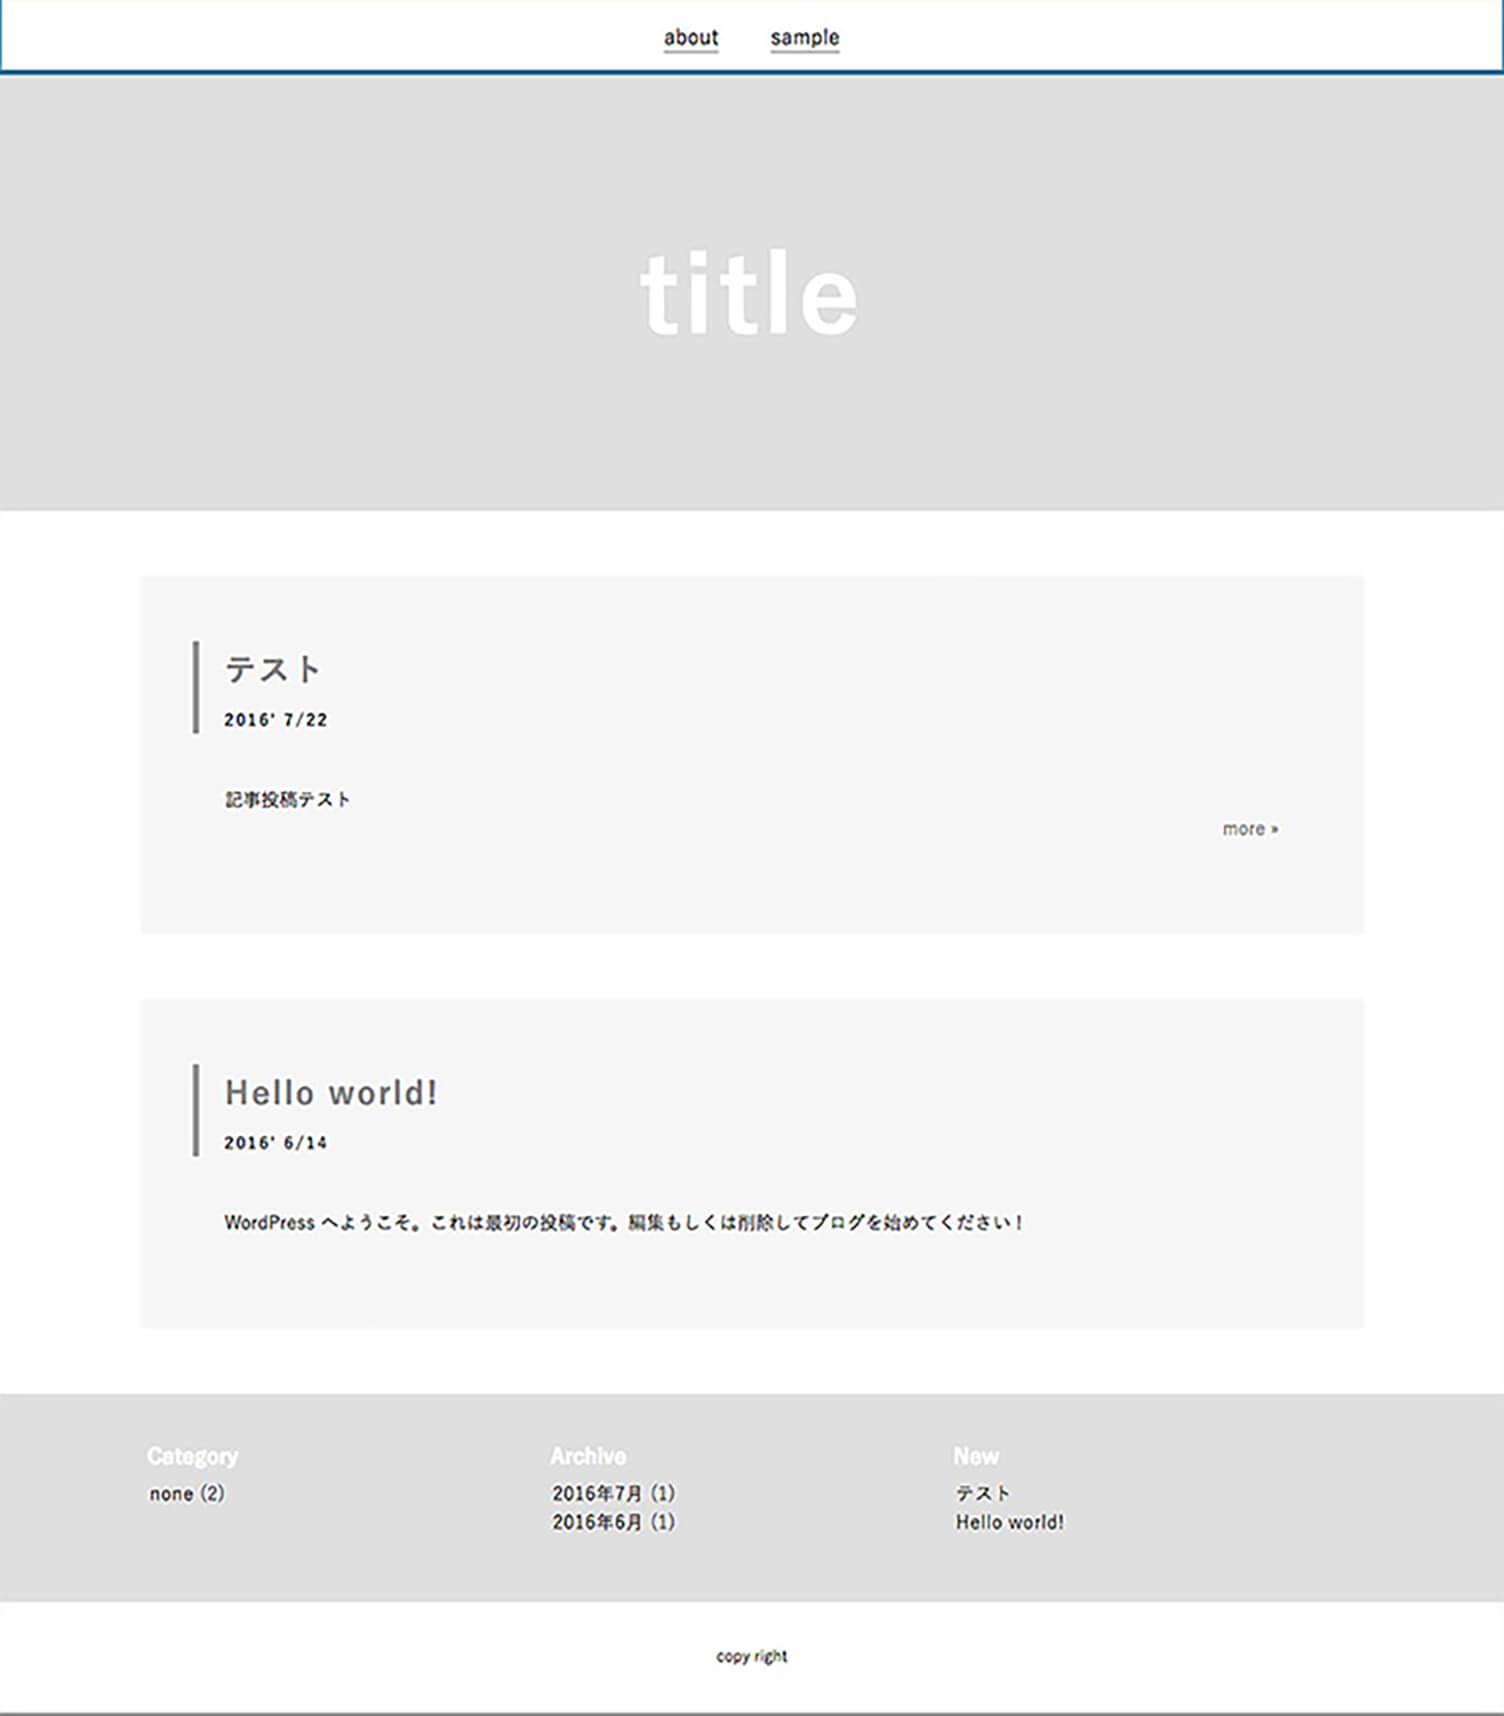
If the linked page now displays a single article correctly, the setup is complete.
Since the article display is almost identical to the index page, the same code can be reused.
Being able to reuse the code directly makes the process very simple.

Next, let’s edit the static pages linked from the menu.
This is done in page.php, and once again, you can simply copy and paste the contents of index.php.
Check the sample static page and make sure the title and content are displayed correctly.
You will probably notice that the date is still being displayed, but you can safely remove unnecessary tags and adjust the layout with CSS as needed to complete the static page design.
Now, here is a simple explanation of why the same template tags can be used even though posts and static pages are different types of content.
<?php get_header(); ?> and <?php get_footer(); ?> are used on every page because headers and footers are shared site-wide elements.
<?php if ( have_posts() ) : while ( have_posts() ) : the_post(); ?><?php endwhile; endif; ?>
can be used not only for blog posts, but also for loading static pages.
Likewise, <?php the_content(''); ?> can display both post content and static page content.
Since we copied the entire file, the date display tag <?php echo get_the_date(); ?> is still included, but you can remove it if it is unnecessary.
With that, the basic blog setup is now complete.
Create the Sidebar
So far, we have created a layout where elements such as the header, articles, and footer are arranged vertically.
Next, let’s move the widgets that were displayed in the footer into a sidebar, which is commonly used in blogs, and increase the number of columns in the layout.
Note: To display a sidebar correctly, you will need to adjust the CSS according to your blog’s layout.
The file used here is sidebar.php.
The widget code displayed in the sidebar is the same as the one previously used in the footer.
Simply move the widget section written in footer.php directly into sidebar.php.
<?php if ( is_active_sidebar( 'widget_area' ) ) : dynamic_sidebar( 'widget_area' ); else: ?>
<div class='widget'><h2>No Widget</h2></div>
<?php endif; ?>
This prepares the sidebar to display widgets.
Now, insert <?php get_sidebar(); ?> anywhere you like in index.php and preview the page.
If the CSS adjustments have been completed, the widgets that previously appeared in the footer will now be displayed side by side in the sidebar like this.

Summary
What did you think?
Even without an in-depth understanding of PHP, you were probably able to create a theme surprisingly easily by using template tags.
In this tutorial, we created a sample theme using only the minimum elements needed for a blog site,
but WordPress allows you to add many more features and functions.
One of the greatest appeals of WordPress is being able to use these various features to gradually build your ideal original theme.
We hope this tutorial will be useful for practicing theme editing and customization.
RECENT POSTS

Vol.203
What Is Design Management

Vol.202
Why Hiring No Longer Works— Redesigning Organizations and Decisions for an Uncertain Age

Vol.201
How to Choose a Branding Agency: 5 Criteria to Avoid Failure

Vol.200
Design Management: A Practical Guide for SMEs and Startups to Drive Real Results

Vol.199
How to Rebuild Brand Competitiveness: A Practical Guide to Brand Management for SMEs

Vol.198
From parent–child bonds to community: The future of education that nurtures diversity and designs relationships


